
Buttery, crispy, crumbly tart crust that’s simple to make and goes well with any filling! If you’re looking for the chocolate version of this dough, you’ll find it here.

Making homemade tart crust may seem scary to many people, and whenever I try to explain to someone how it’s done, I usually lose them at the ‘blind baking’ or ‘pie weights’ part. But as with anything, the process becomes simpler and quicker after a few tries, and the results are well worth the preparation and practice.
This recipe is great for any tart you’re making. It’s crumbly and sweet with a firm cookie-like texture. Tart dough is a bit different than pie dough, which is more flaky and tender.

As an Amazon Associate, I earn from qualifying purchases. I endorse products that I love and use daily.
Granulated sugar vs powdered sugar
Powdered sugar is my preference since it yields a more tender crust with an unbeatable melt-in-your-mouth texture, while using granulated sugar can make it more crumbly. Different recipes use different amounts of sugar, but I find this one to be just perfect for a sweet crust. If you prefer a less sweet tart, use less sugar.
Eggs
Classic tart dough is usually enriched with eggs or egg yolks. In this recipe, I find that using 1 whole egg is pretty foolproof. If you like to experiment, try substituting the whole egg with 1 egg yolk plus 1-2 tablespoons heavy cream. The latter is actually my preferred version, but if you’re a beginner, stick to the whole egg.
If you don’t weigh your ingredients with a food scale, you might end up with a dough that’s a bit too dry or wet, but don’t worry. If it’s dry, add a bit of water, and if it’s wet, add a bit of flour.

What is blind baking?
Blind baking refers to baking the crust in a tart pan before adding the filling to it. Since the pastry puffs up during baking, you’ll need to bake it with pie weights, dry beans, or uncooked rice. Once the crust is set, you can remove the weights and let it finish cooking. Blind baking would prevent your crust from becoming soggy.
Partially baked crusts require a shorter baking time and are used for pies that call for baked fillings.
Fully baked crusts take longer to bake and are used for pies or tarts without a baked filling. In either case, you’ll need to bake the crust with pie weights, and then a few minutes longer without pie weights. Here’s a good visual guide on how to use weights when baking a crust.
For step-by-step photos on how to make the crust, check out my pie dough recipe. The ingredients are different, but the method is similar.
My favorite tart fillings
- Classic French Lemon Tart with a creamy, dreamy lemon curd filling
- Vanilla Pastry Creme topped with seasonal fresh fruit
- Chocolate Blood Orange Tart with orange curd and chocolate ganache
- Strawberry Rhubarb Tart with a strawberry rhubarb curd filling
- S’mores Pie with chocolate ganache and a toasty marshmallow topping
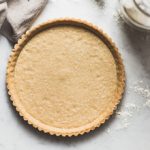
Sweet Tart Crust Recipe
Buttery, crispy, crumbly tart crust that's simple to make and goes well with any filling!
Ingredients
- 1 ½ cups (180 g/6.3 oz) all-purpose flour
- ½ cup (55 g/2 oz) powdered sugar (or ¼ cup granulated sugar)
- ¼ teaspoon salt
- ½ cup (1 stick/115 g) cold butter, cut into small cubes
- 1 large egg
- ½ teaspoon vanilla extract , optional
Instructions
-
Process flour, sugar, and salt in a food processor for a few seconds until combined. If you don’t have a food processor, you can do this by using a pastry cutter. Add butter and pulse until mixture becomes crumbly and resembles coarse meal, about 15 pulses.
-
Add egg and vanilla extract and keep pulsing until the dough is no longer dry and starts to clump together, about 10-15 seconds. Do not process to the point that a large ball of dough is formed; rather the dough should be quite crumbly with large clumps. Another way to check if it’s done is to take a piece of dough and press it between your thumbs – the dough should stick without feeling dry or crumbly.
-
Turn dough to a lightly floured surface and form into a ball. It should come together easily without being sticky. Flatten ball slightly with your hands to form a thick disc. Wrap with plastic wrap and refrigerate for at least 1 hour.
-
If you don’t want to use the dough right away, you can refrigerate it for up to 3 days, or freeze it for up to a month and then thaw overnight in the fridge.
-
To roll out the dough:
Take dough out of the fridge and let it sit on the counter for a few minutes to soften slightly for easy rolling. On a lightly floured surface, roll out the dough with a rolling pin into an 11-inch circle, then place gently into a tart pan
(preferably with a removable bottom); you can do this by flouring a rolling pan and rolling the dough loosely around it, then unrolling it into the pan. Brush away any excess flour on the surface. With a sharp knife, trim the edges of the pastry to fit the tart pan. Cover pan with plastic wrap and place in the freezer until firm, about 30 minutes. Frozen dough is less prone to shrinking while baking.
-
Bake the crust:
Preheat oven to 375℉/190℃ and place rack in the center.
-
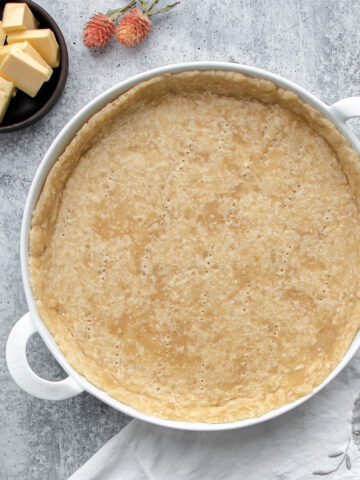
Press parchment paper or aluminum foil tightly against the crust, covering the edges to prevent them from burning. Fill with pie weights/dried beans/uncooked rice, making sure they’re fully distributed over the entire surface.
-
Bake crust for 20 minutes, until foil no longer sticks to the dough. Transfer crust to a wire rack and remove weights and foil. Return to the oven.
-
To partially bake the crust:
Bake for 5 minutes longer. You’ll now need to proceed with your tart recipe, add the filling, and finish baking. According to your recipe, the crust should be used either while warm or after it’s been left to cool on a wire rack.
-
To fully bake the crust:
Bake for about 10 minutes longer until golden brown and dry. Transfer to a wire rack and let cool completely.
Recipe Notes
If you love this recipe, check out our popular Lemon Tart for a creamy, dreamy lemon curd tart filling!