
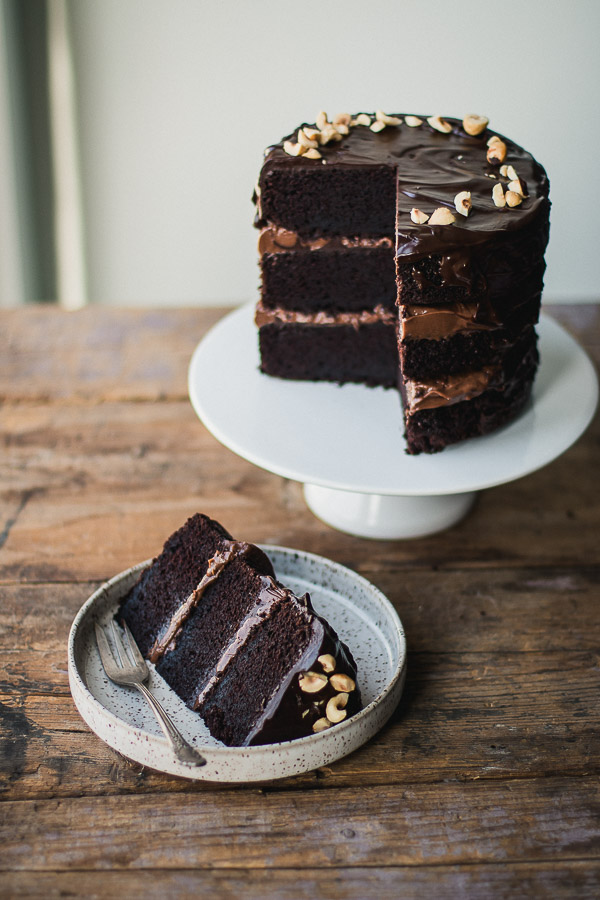
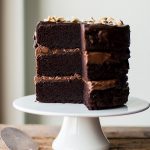
This decadent cake is made with layers of moist, rich chocolate cake, creamy hazelnut frosting, and fudgy, silky smooth chocolate filling. This chocolate hazelnut cake is the ultimate treat for any celebration!
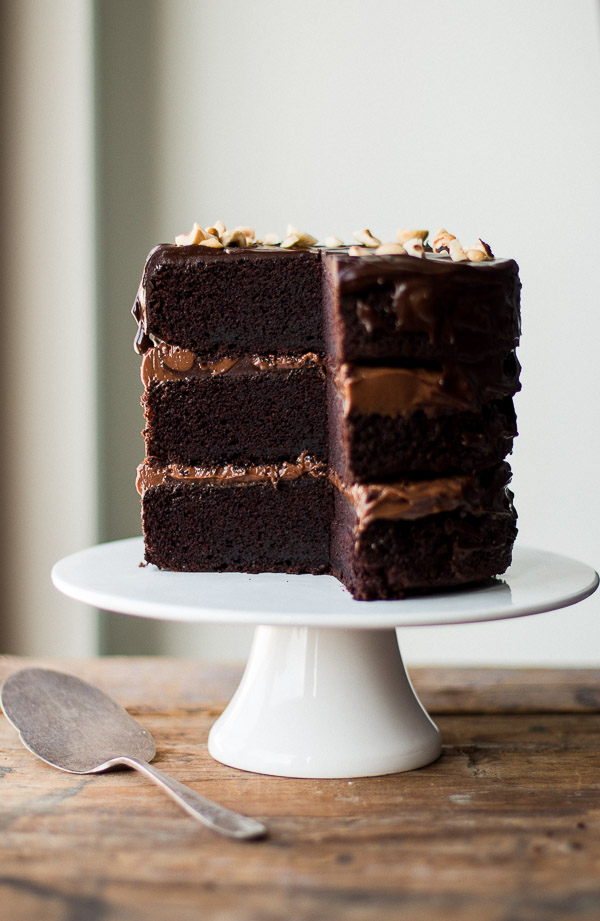
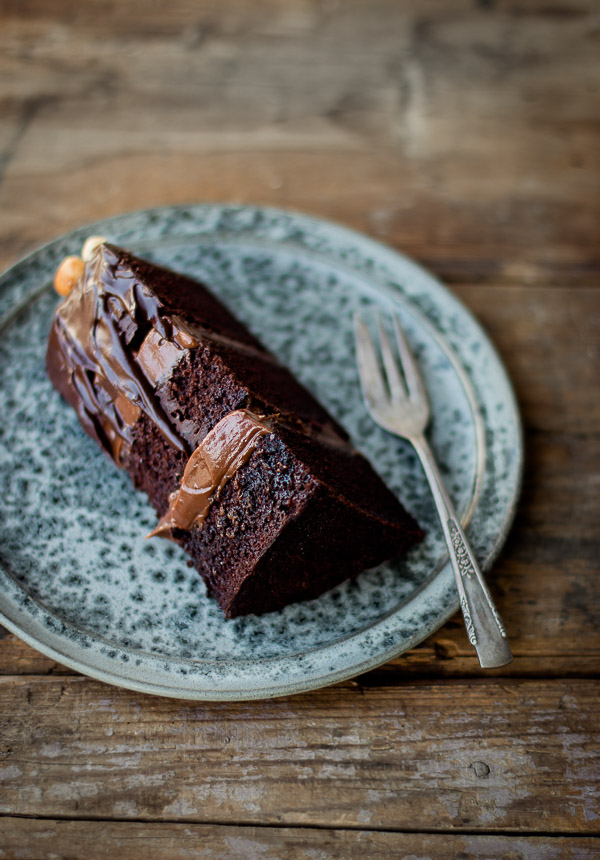
If you are looking for the ultimate celebration cake, you can stop the search immediately, because this chocolate hazelnut cake is it. This exquisite cake is made of layers of moist, decadent chocolate cake, creamy hazelnut frosting, and rich chocolate filling. It’s topped with toasted hazelnuts for added crunch and texture.
Just like my one-bowl chocolate Nutella cake, this layer cake tastes like heaven and is absolutely gorgeous. I first made this cake after stumbling upon the recipe on the blog, Call Me Cupcake, by the talented Linda. I made it for a friend’s birthday and everyone, I mean everyone, absolutely loved it. I took one bite of this moist, fudgy piece of heaven and hoped the moment would never end. The chocolate cake is rich and dense and has this intensely deep chocolate flavor. This is what an ultimate birthday cake should taste like.
If you like Nutella and chocolate as much as I do, then this cake is for.
How to make this amazing chocolate hazelnut cake
Start by baking the cake
This recipe makes enough batter for three 6-inch pans or two 8-inch pans. Just note that if you bake the cakes in the larger pans, you’ll need to bake them a bit longer.
- Prepare your cake pans. Butter three 6-inch or two 8-inch cake pans and dust them with cocoa powder.
- Melt the butter. Then, combine with the milk.
- Combine the dry ingredients. Mix together the flour, baking soda, cocoa powder, sugar, and salt.
- Combine the wet ingredients. Mix the butter mixture, eggs, and sour cream together. Then, stir in the hot coffee.
- Pour the wet ingredients into the dries. Mix together gently, using a whisk to break up any lumps. The batter will be quite thin.
- Divide and bake. Divide the batter evenly between your cake pans. Bake the cakes on the lower rack of the oven for 32-35 minutes or until a cake tester comes out clean. Let the cakes cool in their pans for 15 minutes, then invert onto a cooling rack and allow to cool completely.
While your cakes are baking, prepare the chocolate and hazelnut fillings.
Make the chocolate filling
- Melt butter and chocolate together. Place the chocolate in a saucepan together with butter, over low heat. Stir often until everything is melted. Add a pinch of salt.
- Cool. Allow to cool until the filling becomes a spreadable consistency.
Make the chocolate hazelnut frosting
- Cream the butter. In a standing mixer fitted with the paddle attachment, beat butter until pale and creamy, about 2 minutes.
- Add the rest of the ingredients. Add room temperature cream cheese, powdered sugar, chocolate hazelnut spread and salt and beat until the frosting is completely smooth and fluffy. If the frosting feels loose, place the bowl in the fridge until it firms up a bit.
Assemble your chocolate hazelnut cake
Once your cakes have completely cooled, you can assemble your beautiful layer cake.
- I recommend using a bread knife to slice off the rounded tops of your cakes so both sides are flat. This will allow you to spread the fillings on them easily and allow your cakes to stack and stay in place.
- Place the first cake layer on a plate or cake stand. Spread chocolate filling over the top, then pipe or spread a layer of hazelnut frosting on top (save some frosting for the second layer as well). Leave a small bit of space around the edge without frosting, because the weight of the cake will cause it to spread a bit on its own.
- Place the second layer on top of the first layer. Spread a second layer of chocolate filling, then pipe or spread a layer of frosting on top. Put the third layer on top. Put the cake in the fridge to stabilize it while you prepare the dark chocolate glaze.
Make the dark chocolate glaze
- Melt butter and chocolate together. Coarsely chop the dark chocolate and place it in a saucepan together with butter, over low heat. Stir often until melted. Add a pinch of salt.
- Cool. Let cool slightly but make sure it doesn’t thicken too much. You want it to still be liquid so it can easily pour over the top of your cake, but it shouldn’t be hot.
- Glaze your cake. Pour the glaze over the cake and quickly spread it over the edges of the cake to make it run down the sides.
Keep your cake refrigerated but serve at room temperature for optimal flavor.
Tips for making perfect chocolate hazelnut cake
-Don’t over mix your batter. This can cause your cake to become extra tough and dense, and we want it to be light and fluffy. Once you combine the dry and wet ingredients, mix together gently just until everything is incorporated.
-Depending on what size cake pans you bake in, you may need to adjust the baking time. If using 6-inch pans, your cakes should finish baking in about 30 minutes. If using 8-inch pans, they will take a little bit longer to bake, so check them every 3-5 minutes after the first 30 minutes.
-When preparing the hazelnut filling, let the butter and cream cheese sit out at room temperature to soften. This will help the ingredients emulsify better and prevent lumps in your frosting.
-Toast the hazelnuts. Toasted hazelnuts have much more flavor and a nice golden color. To toast them, place on a sheet pan and bake for 8 minutes at 350°F/175°C, tossing halfway through. Allow to cool completely before garnishing your cake.
More of my favorite cake recipes
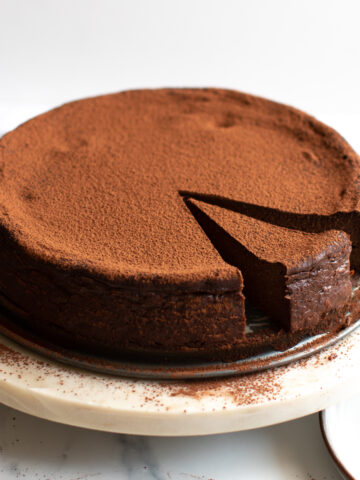
- Chocolate Almond Torte: Flourless, rich and insanely fudgy.
- Flourless Chocolate Hazelnut Cake: Another spectacular flourless cake made with ground hazelnuts and creamy Nutella.
- White Cake: Tender, delicate white cake layered with rich and creamy vanilla frosting.
- Stout Gingerbread Cake: Stout beer adds richness and moisture to this yummy cake.
- My Favorite Chocolate Birthday Cake: Full of chocolatey goodness.
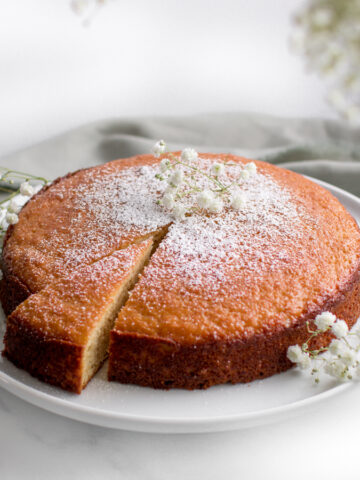
- Lemon Olive Oil Cake: Bursting with Mediterranean flavors.
Chocolate Hazelnut Layer Cake
Made with layers of rich chocolate cake, creamy hazelnut frosting, and chocolate ganache, this fudgy chocolate hazelnut layer cake is the ultimate treat for any celebration.
Ingredients
Chocolate Cake:
- 1 ¾ cup + 2 tablespoons (200g) unsalted butter
- ½ cup (120 ml) whole milk
- 1 ¾ cups (240g) all-purpose flour
- 1 ½ teaspoons baking soda
- ⅔ cup (67g) cocoa powder
- 1 ½ cups (300g) granulated sugar
- ¼ teaspoon salt
- 2 large eggs
- ⅔ cup (150 ml) sour cream
- ½ cup (120 ml) hot coffee (hot water dissolved with instant coffee powder)
Chocolate Filling:
- 75g (2.5 oz.) semisweet chocolate, coarsely chopped
- 2½ tablespoons (35g) unsalted butter
- Pinch of salt
Chocolate Hazelnut Frosting:
- 1 ¼ sticks (150g) unsalted butter, softened
- ½ cup (113g) cream cheese or mascarpone cheese
- ½ cup (60g) powdered sugar
- ¾ cup plus 2 tablespoons (250g) Nutella or chocolate hazelnut spread
- pinch of salt
Chocolate Glaze:
- ½ cup (75g) dark chocolate, coarsely chopped
- 3 tablespoons (45g) butter
- Pinch of salt
Instructions
-
To make the cake: Preheat oven to 175°C/350°F. Butter three 6-inch (15 cm) cake pans and dust them with cocoa powder.
-
Melt the butter, add milk and set aside to cool.
-
In a large bowl, mix together the flour, baking soda, cocoa powder, sugar and salt. Add the butter mixture, eggs and sour cream to the dry ingredients and mix until just combined. Add the hot coffee and stir until smooth (batter will be quite liquid).
-
Divide the batter evenly between the three cake pans. Bake the cakes on the lower rack for 32-35 minutes or until a cake tester comes out clean. Let the cakes cool in their pans for 15 minutes, then invert onto a cooling rack and allow to cool completely.
-
To make the chocolate filing: Place chocolate in a saucepan together with butter, over low heat. Stir often until everything is melted. Add a pinch of salt. Let cool to spreadable consistency – meanwhile you can prepare the frosting.
-
To make the chocolate hazelnut frosting: In a standing mixer fitted with the paddle attachment, beat butter until pale and creamy, about 2 minutes. Add the cream cheese, powdered sugar, chocolate hazelnut spread and salt and beat until frosting is completely smooth and fluffy. If frosting feels loose, place the bowl in the fridge for a while.
-
Assemble the cake:
Slice the rounded tops of each cake with a serrated bread knife to create flat tops. Place the first cake layer on a plate or cake stand. Spread with chocolate filling, then pipe or spread a layer of frosting on top (save some frosting for the second layer as well). Don’t pipe or spread all the way out to the edge as the weight of the cake will make it spread.
-
Place the second layer on top of the first layer. Spread second layer with chocolate filling, then pipe or spread a layer of frosting on top. Put the third layer on top. Put the cake in the fridge to stabilize it while you prepare the dark chocolate glaze.
-
To make the chocolate glaze: Coarsely chop the dark chocolate and place it in a saucepan together with butter, over low heat. Stir often until melted. Add a pinch of salt. Let cool slightly but make sure it doesn’t thicken too much, it should still be liquid. Pour the glaze over the cake and quickly spread it over the edges of the cake to make it run down the sides.
-
Keep cake in the fridge but serve it in room temperature.
Recipe by Linda from Call Me Cupcake.